If you’ve started using QuickBooks Online Plus and think something is missing, check your Company Settings. New users should do this first.
QuickBooks solutions are built to appeal to a wide variety of small businesses. But they’re also very customizable, which means that you can turn features on and off, specify default settings, change the layout and design of forms, and basically set it up so it seems like it was made just for you.
Let’s look at how this works in QuickBooks Online Plus. This cloud-based solution is easy enough to use that if you understand basic accounting concepts, you can jump in and start doing your bookkeeping. If you don’t understand basic accounting concepts, we can go through the setup procedure so you understand QuickBooks Online’s individual elements and how they work together.
If you do just dive in, at some point you’re likely to run up against something that’s missing, or doesn’t work the way you need it to. That’s why you need to look at QuickBooks Online’s Company Settings. You’ll find them by clicking on the little gear icon in the upper right corner and selecting Company Settings.
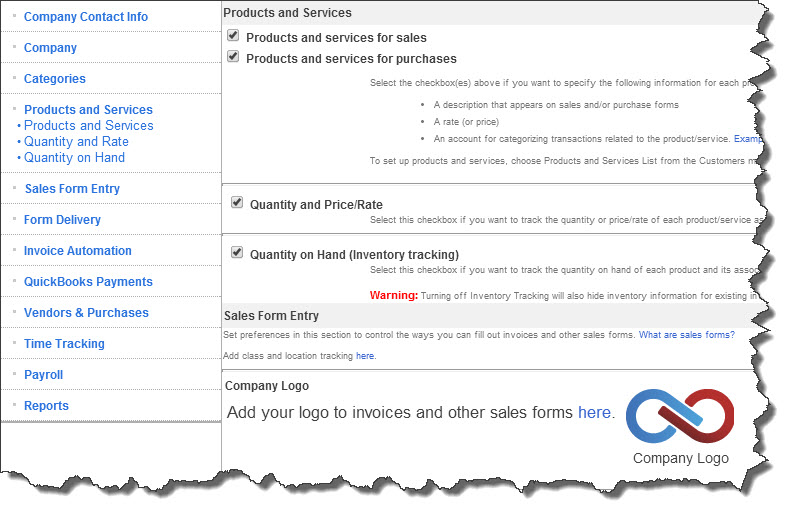
Figure 1: This window opens when you click on Company Settings. It’s good to do much of your setup here before you get started, but you can always revisit it.
Many decisions
If you haven’t already done so, start at the top of the vertical pane and complete the blank fields in the Company Contact Info and Company sections.
Here are the other areas that you should visit as early on in your work as is possible.
Categories. Do you want to be able to assign transactions to Departments, Locations, Territories, etc.? You can use Territory Tracking to do so, but you can only select one of those designations to use throughout QuickBooks Online. If you choose Division, for example, you’ll create a list of options for that field in transactions, like Sales, Marketing, Accounting, etc.
But you can also categorize income and expenses using Class Tracking. This is especially useful at report time. QuickBooks Online lets you create multiple Classes and assign different ones to individual lines in the same transactions. So while each transaction can only have one designated territory, it may represent many classes.
This distinction can be confusing. In addition, it’s important that you create the best Territory and Class Tracking schemes for your purposes. Let us help.
Products and Services. If you buy and/or sell products and/or services, you need to make sure these boxes are checked. The next two boxes should also be checked if you want to track the Quantity and Price Rate and Quantity on Hand (Inventory tracking).
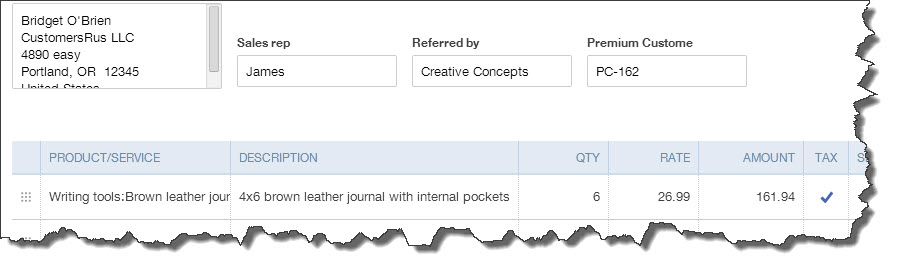
Figure 2: If you want to include Quantity and Price Rate on sales forms, you must specify this in Company Settings.
!!Note: Unless boxes are checked in front of QuickBooks Online features, you will not see them as you’re working on the site.!!
Company Logo. Easy. Simply upload the file that contains your company logo so that it will appear on forms.
Custom fields. QuickBooks Online comes with a pre-defined set of fields in forms and transactions that are commonly used by many types of business. But it lets you add your own to meet the needs of your specific company. These fields will appear on invoices, sales receipts, refund receipts and credit memos. Put a check in the box at the beginning of each line, enter the labels for your new fields and designate their order of appearance (1, 2, 3). They will appear to the right at the top of your forms.
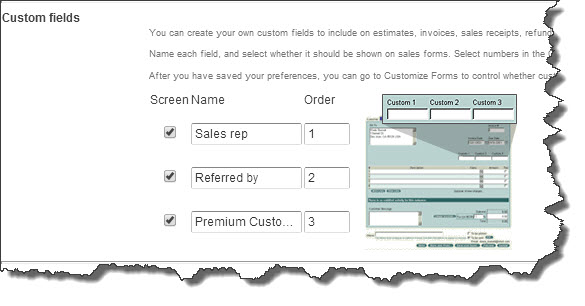
Figure 3: Customize your sales forms by adding extra fields that your business needs.
Custom transaction numbers. QuickBooks Online auto-assigns numbers, but allows you to set up your own, more descriptive numbering scheme that can include letters.
Deposits. Does your company allow deposits? Check the box and QuickBooks Online will add a field to your invoices.
Discounts. If you offer flat rate and percentage discounts to customers, check this box and select the account where they should be recorded. Discounts given is the default, but you can change this – even for individual transactions.
Estimates billing method. Click the appropriate button to indicate whether you want Accepted or Pending or just Accepted estimate charges to appear on invoices, or not at all. You can also create a boilerplate message that will appear on estimates only and one for sales forms. These can be altered for individual transactions.
You’re not done yet. We’ll explore other Company Settings next month.